

The Gradle dependency tree is the backbone of your Gradle builds. Its representation can help you visualize the structure of all of the gradle dependencies in a project, as well as any transitive dependencies. Not so long ago I wrote a Twitter thread sharing some tips to debug your slow Gradle builds which led me into the journey of diving deeper into this topic.
This is a great question to refresh and revise what I have learned over the years from my ex-colleagues especially @inyaki_mwc & @jperezalv
— Ishan Khanna (@droidchef) November 17, 2022
I'll try to summarize what usual suspects I can recall in the 🧵 https://t.co/lgZDmeIKTn
In this article, I discuss
- What are dependencies and transitive dependencies in Gradle?
- What is a dependency tree in Gradle?
- What are the different dependency configurations in Gradle?
- Five ways to generate a dependency tree in your Gradle project.
By reading the whole article, you will
- have a solid understanding of Gradle dependency tree
- be equipped with the knowledge to generate a Gradle dependency tree using different ways for any project.
Let's get started by covering some basics.
What is a Dependency in Gradle?
A dependency in Gradle is a relationship between two elements that allow one to access the content, resources, or libraries of the other element. It can be between modules within a project or external dependencies from external sources such as Maven Central and JCenter.
A Gradle dependency establishes an association between the two elements by specifying the version of the dependency being used. When Gradle constructs a dependency tree, it takes into account both transitive and direct dependencies.
What is a Transitive Dependency in Gradle?
A transitive dependency in Gradle is a dependency that is implied by another dependency and thus pulled into the project from an external source.
Transitive dependencies are resolved using the version of the library declared by the original dependency, and all of them for that library is then included in your project.
This can lead to unnecessary bloat in your projects if you are not careful about managing your gradle dependencies.
Different Types of Transitive Dependencies
They can be both direct and indirect; for example, if you declare a direct dependency on Library A, which has a transitive dependency on Library B, you will also end up with Library B included as a transitive dependency in your project.
It is important to manage these various versions carefully to avoid conflicts or other unexpected behavior in your project.
Configuring Gradle Dependencies in a Gradle Project
Gradle allows us the ability to group dependencies by specifying a dependency configuration. You may have seen words like implementation, androidTestImplementation or testImplementation in your project’s build.gradle files.
By default, a Gradle build doesn’t support any dependency configuration however they integrate with your build via plugins such as the Android plugin, Kotlin Plugin, or the Java Plugin.
These configurations are used by Gradle to generate classpaths for building project for production or testing.
It is important to know this before you generate your dependency tree as you might start wondering why are there multiple configurations in your build.
With the basics out of the way, now it is time to actually start generating the dependency tree.
Generating A Gradle Dependency Tree
There are five ways to generate the Gradle dependencies. The quickest way is to use the dependencies task. However, it may not always be suitable or give you the best results. So we will walk through all the different ways you can generate and visualize it.
“I personally don’t use or recommend using Android Studio for anything other than writing code, especially if you are working on a relatively large code base. However, I still do talk about it for anyone feeling adventurous.”
Prerequisite
If you would like to follow the commands I run in the sections below. You can set up a lightweight sample project I created to demonstrate the impact of dependency tree depth on your gradle builds by completing the steps below.
- Open your Terminal and Go to the directory where you save your projects, for me, it is
~/dev/
cd ~/dev/
- Clone a sample root project like this
git clone git@github.com:droidchef/dep-height-example.git
- Change the directory to the root project like this
cd dep-height-example
Now you are ready to run all the commands mentioned in the steps below.
1. Using Dependencies Task in Command Line
The easiest way to generate a dependency tree for your project is to run the dependencies task at the root of your project and here is how you do it.
In your terminal, Go to the root directory of your application and Run the following on the command line
./gradlew :{moduleName}:dependencies
Here {moduleName} should be replaced with the name of the module you want to want to view the dependency tree for.
The sample which is a multi-module project has a module named contractor and I will try to list the gradle dependencies for it by running the following
./gradlew :contractor:dependencies
Here is what the output looks like
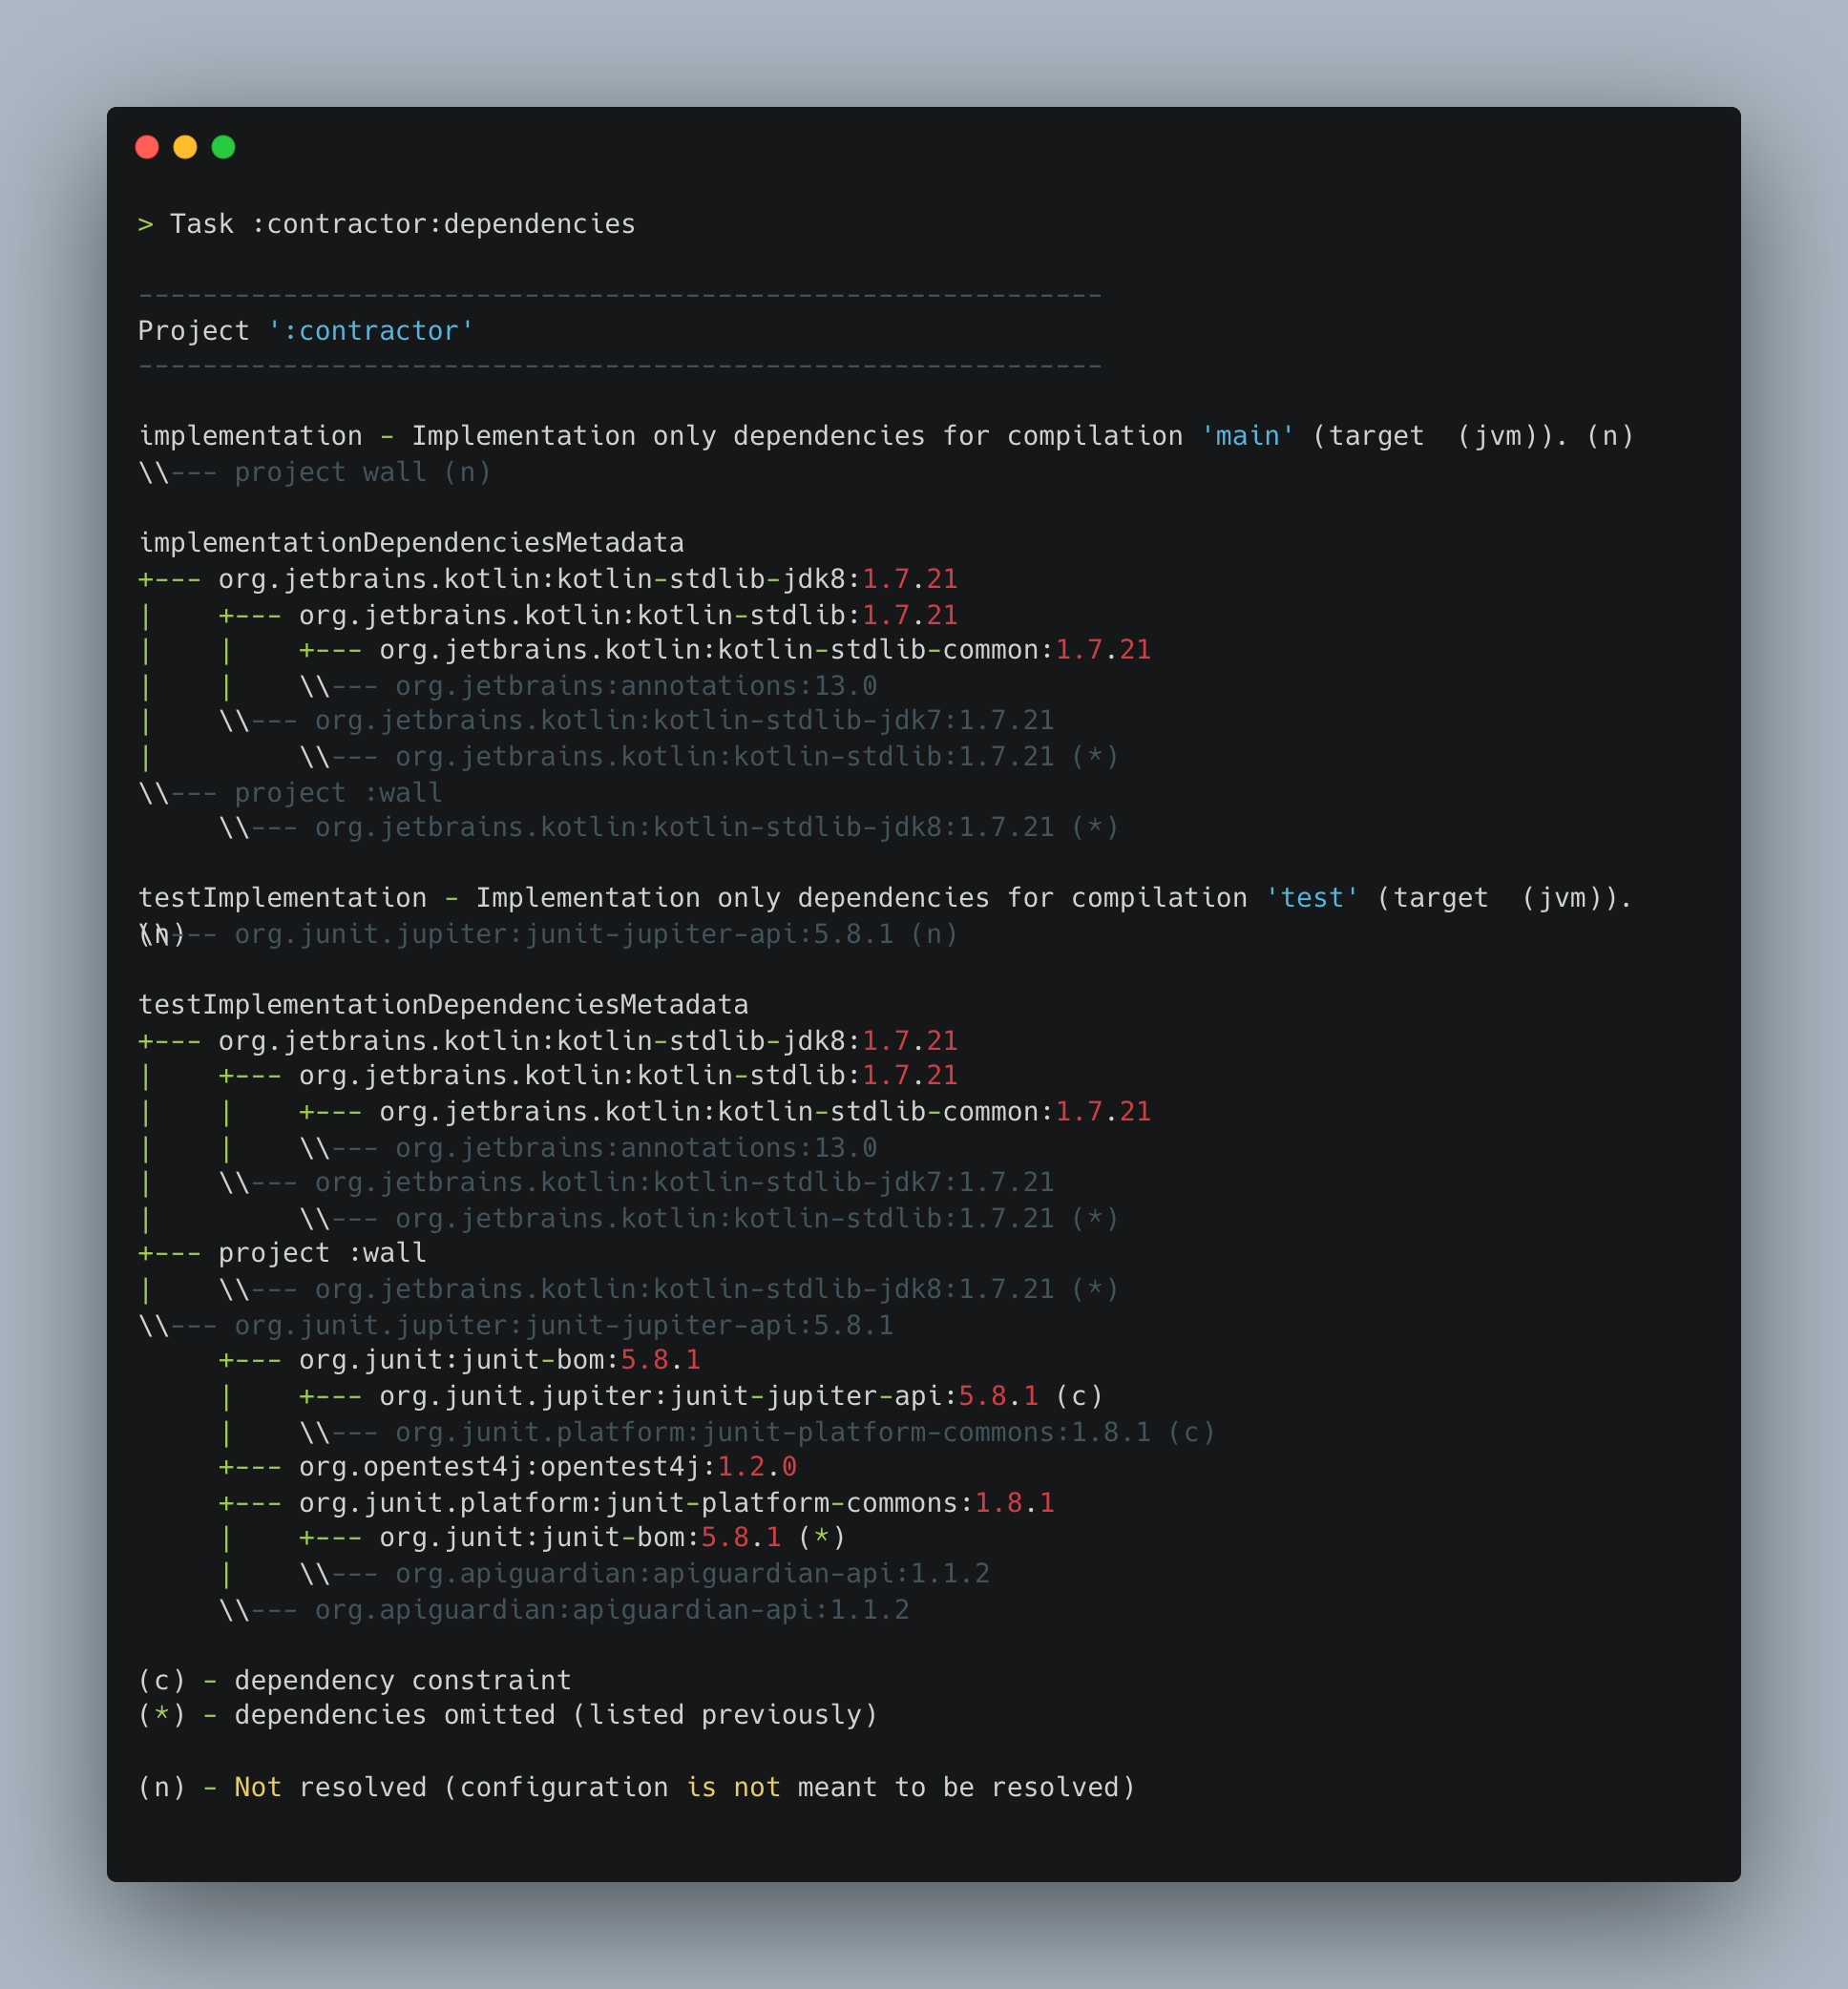
As you can see, the output of the dependencies task is extremely verbose as it contains results for all configurations, classPaths, elements, and their respective metadata.
Fortunately, our amazing colleagues at Gradle have provided us with a mechanism to control the result to only show specific types of configurations and this is what you will be using most of the time during your investigations.
How to filter dependencies by configuration?
You can use the configuration parameter with the dependencies task in Gradle to view dependencies for a specific configuration type.
This is how you would construct your gradle task
./gradlew :{yourModuleName}:dependencies --configuration {yourConfigurationName}
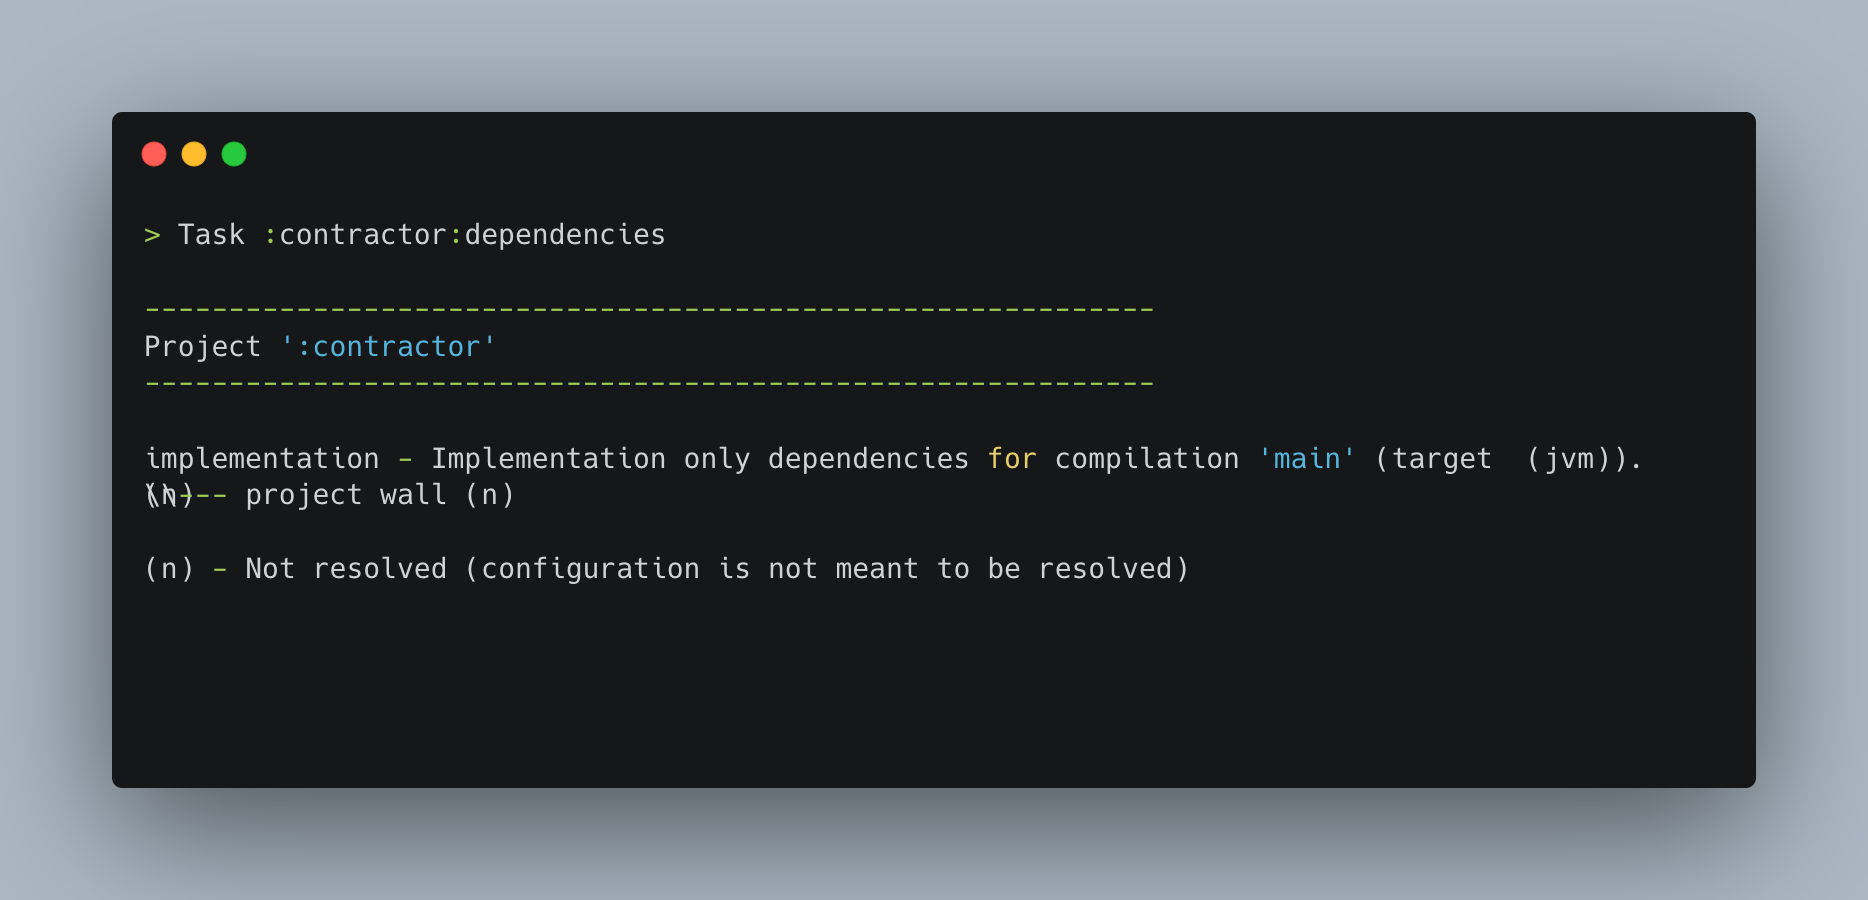
Here is an example showing implementation dependencies for the contractor module of the sample multi-module project
./gradlew :contractor:dependencies --configuration implementation
Here is the example result
List of Supported Parameters for Configuration Task
The configuration parameter supports the following inputs
compiletestCompileimplementationtestImplementation
If your root project is an Android project then you also have access to these along with the above-mentioned inputs
androidTestCompileandroidTestImplementation
Here are the examples showing how you can use the above parameters
./gradlew :{moduleName}:dependencies --configuration compile
./gradlew :{moduleName}:dependencies --configuration testCompile
./gradlew :{moduleName}:dependencies --configuration testImplementation
./gradlew :{moduleName}:dependencies --configuration androidTestCompile
./gradlew :{moduleName}:dependencies --configuration androidTestImplementation
2. Using Project Report Plugin
If you have a large project or a small screen you can also generate the dependencies report using a plugin. The plugin is called The Project Report Plugin. It will give you an HTML-based dependencies report that allows you to browse the whole dependency tree in your favorite browser.
It is extremely easy to set up and here is how you do it.
How to Integrate Project Report Plugin?
- Open the
build.gradlefile in the root directory of your project. - Add this to the top of the file
apply plugin: 'project-report'
or
plugins {
    id 'project-report'
}- Sync the Project in your IDE (Optional)
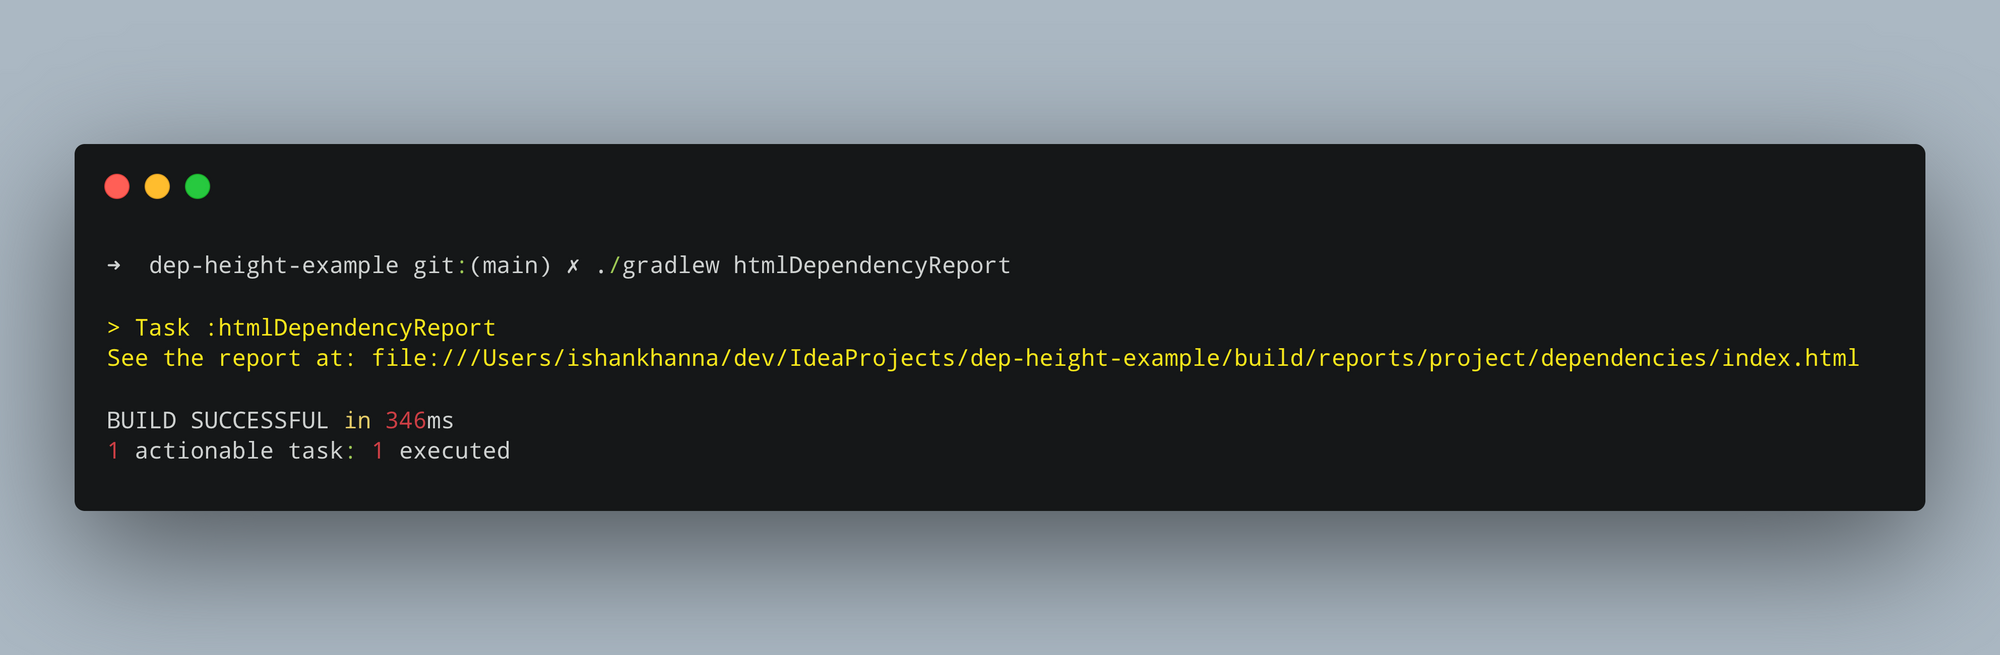
- Run the following command in your terminal
./gradlew htmlDependencyReport
- Open the HTML Report generated by Gradle. The file path is usually
{project root}/build/reports/project/dependencies/index.htmlwhere{project root}refers to the root directory of your project.
You can also Command (or Cmd) ⌘ + Click on this file:// path and it should open in your browser.
When you open this report you will see the project for which the report was generated.
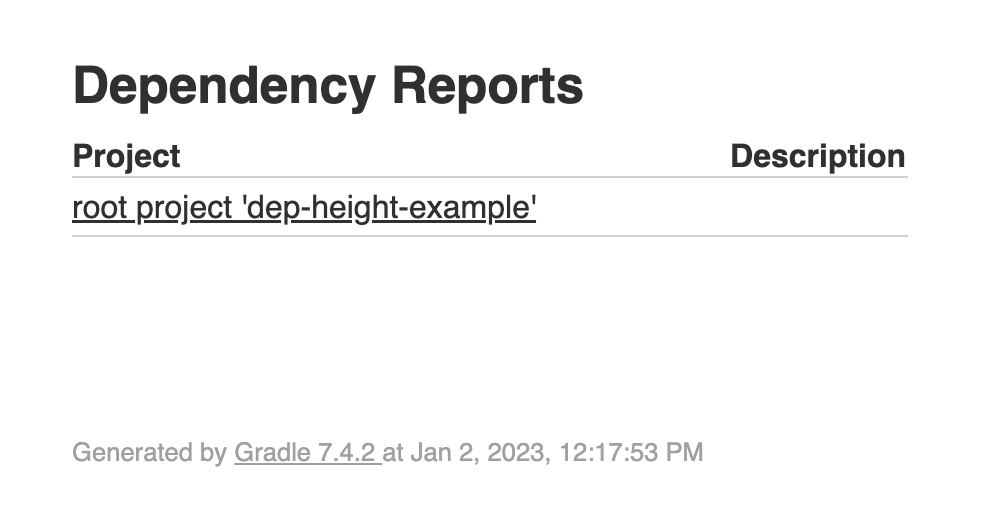
- Click on the root project URL to see the searchable dependency report
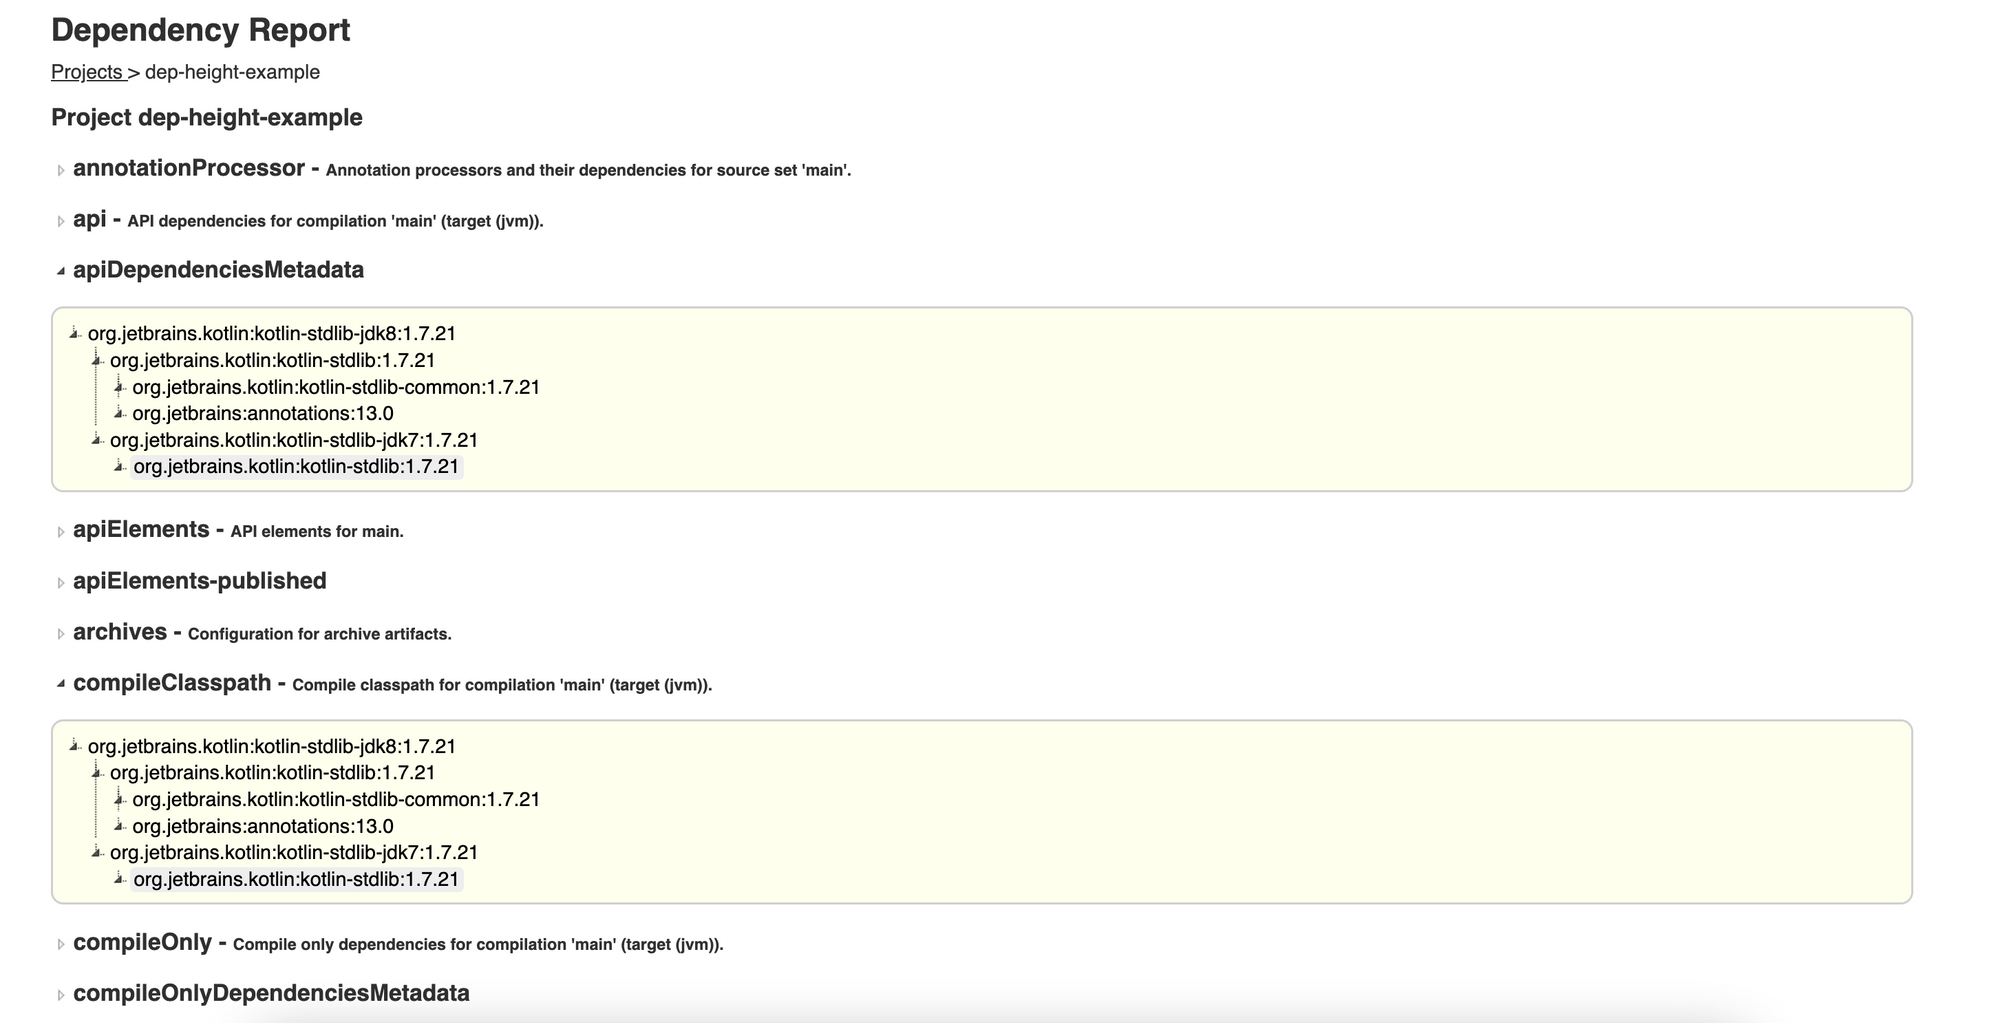
- Click different dependency configurations to view the report in detail.
3. Using Gradle Dependency Graph Generator Plugin
Now if you are really interested in digging deep into your project’s dependency structure. There exists a third-party Gradle plugin that is built primarily for this purpose. I personally find it useful when dealing with modularization or if I want a glance at the whole dependency tree at once.
It is called gradle-dependency-graph-generator-plugin, developed and maintained by Niklas Baudy.
You can use it to generate a visual graph for your project’s dependencies in formats like png, SVG, and dot.
How to Integrate Gradle Dependency Graph Generator Plugin?
- Open the
build.gradlefile of your root project
You can also add it to a specific project or module and it will work fine
- Add the following to the Gradle file.
buildscript {
  repositories {
    mavenCentral()
  }
  dependencies {
    classpath "com.vanniktech:gradle-dependency-graph-generator-plugin:0.8.0"
  }
}

apply plugin: "com.vanniktech.dependency.graph.generator"
or
buildscript {
  repositories {
    mavenCentral()
  }
  dependencies {
    classpath "com.vanniktech:gradle-dependency-graph-generator-plugin:0.8.0"
  }
}

plugins {
 id 'com.vanniktech.dependency.graph.generator' version '0.8.0'
}
- Sync with gradle in your IDE and Run this task in your terminal
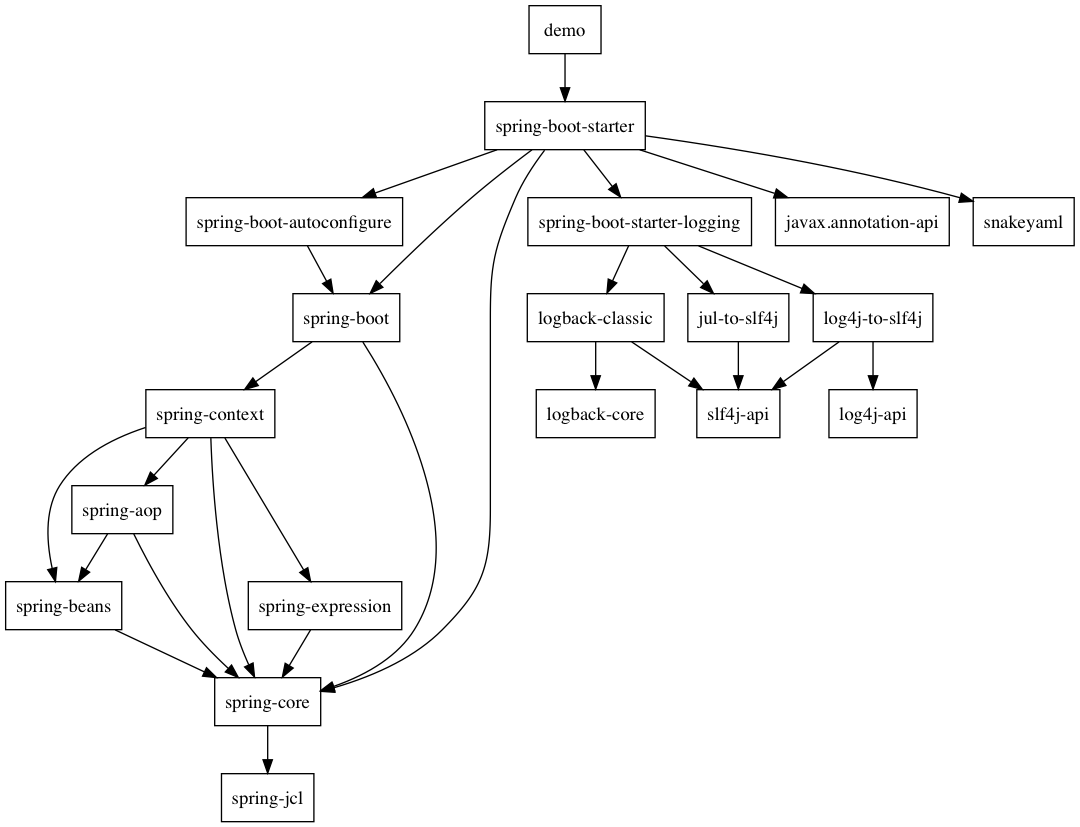
./gradlew generateDependencyGraphThis will generate the gradle dependencies graph in this directory build/reports/dependency-graph/ that looks like this.
4. Using Gradle Build Scan
Gradle build scans are like an X-ray for your Gradle and Maven builds.
If you are using build scans in your Gradle project. You get access to the project dependencies for free. If you have never generated a Gradle build scan before, you can generate one right now for free in under two minutes.
The only thing you need is the --scan parameter at the end of any Gradle command you run in your terminal.
Let’s use a simple command to list the tasks of the project to generate a build scan.
Go ahead and run this command in the root directory of your project.
./gradlew tasks --scan
Once the build ends, you will be prompted for a confirmation to generate the build scan. This is because Gradle will be collecting build information and information about your hardware and sending it to their servers.
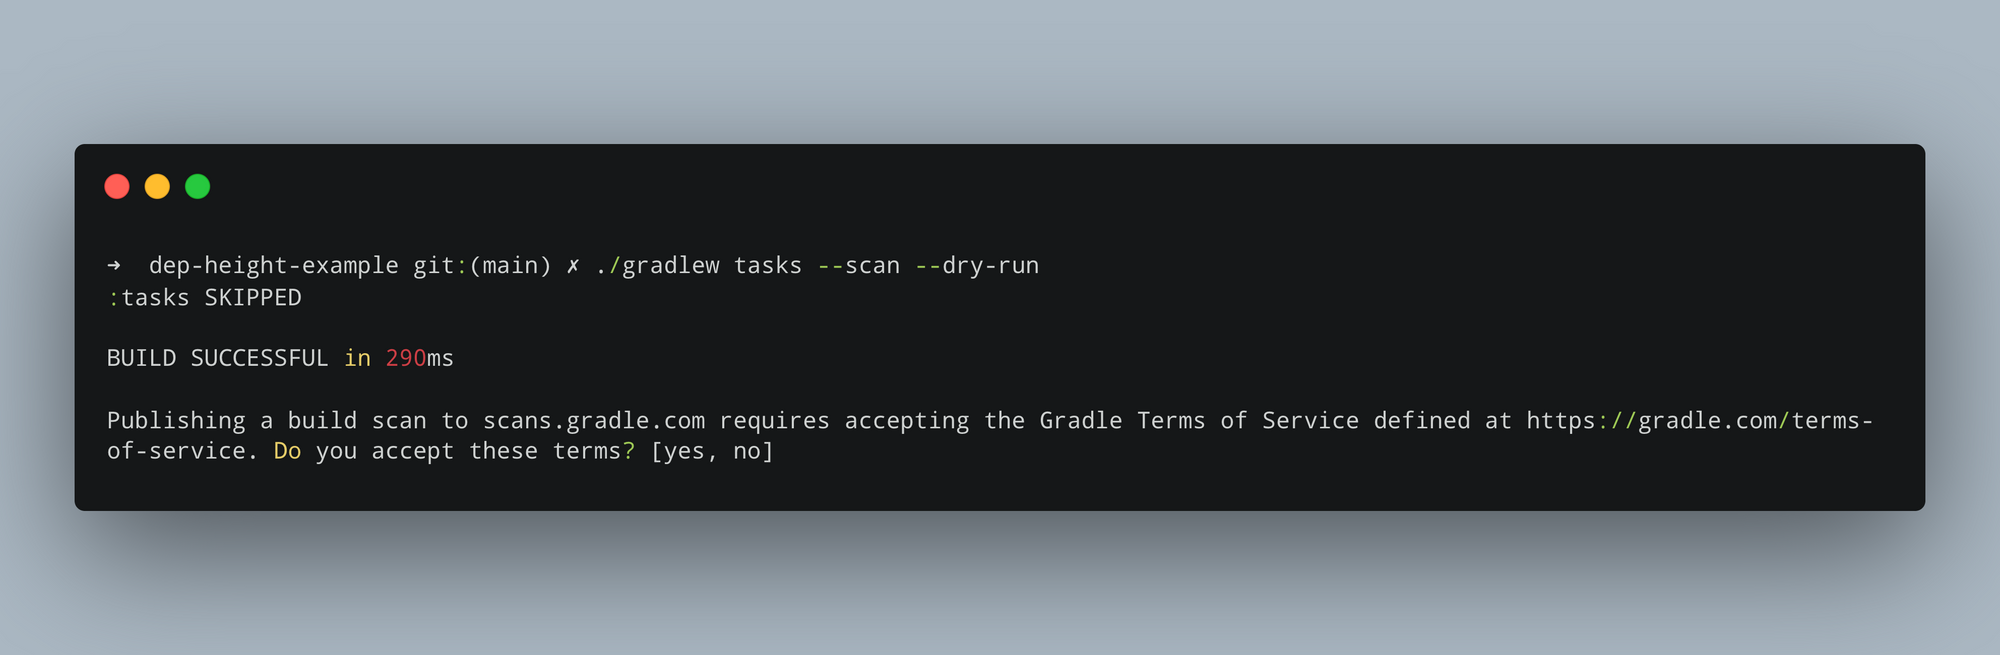
If you are okay with this, type yes and hit Enter.

Then you’ll see a link to your personal build scan access page in your terminal.
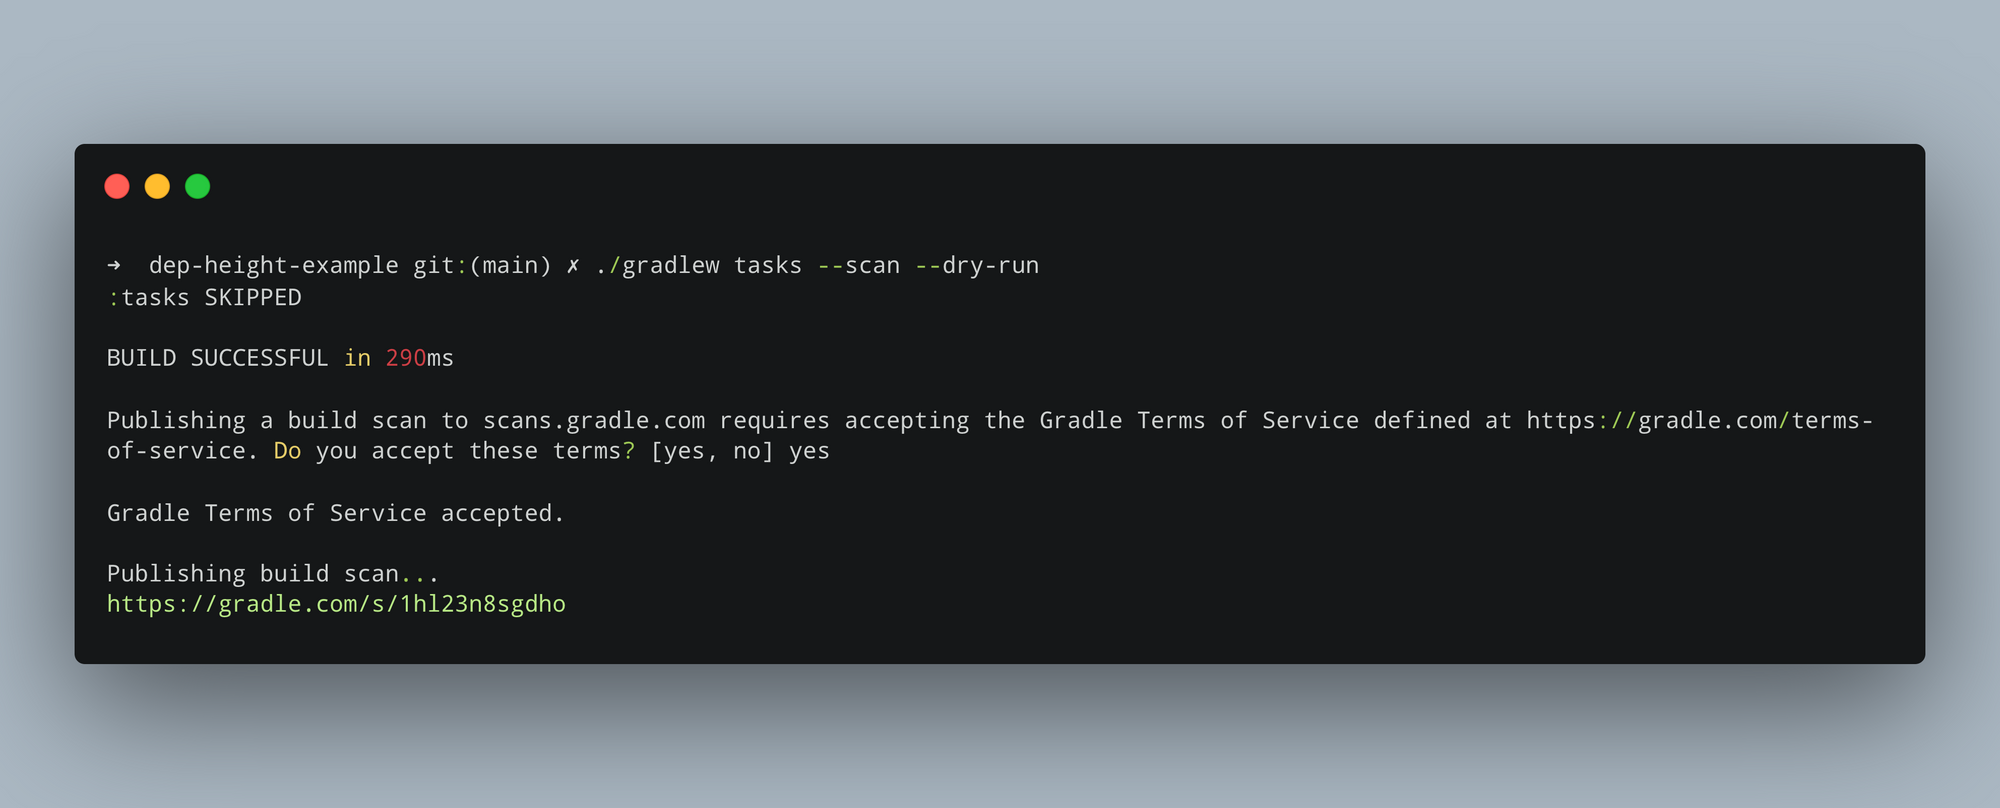
Open that URL in your browser and this is what you will see.
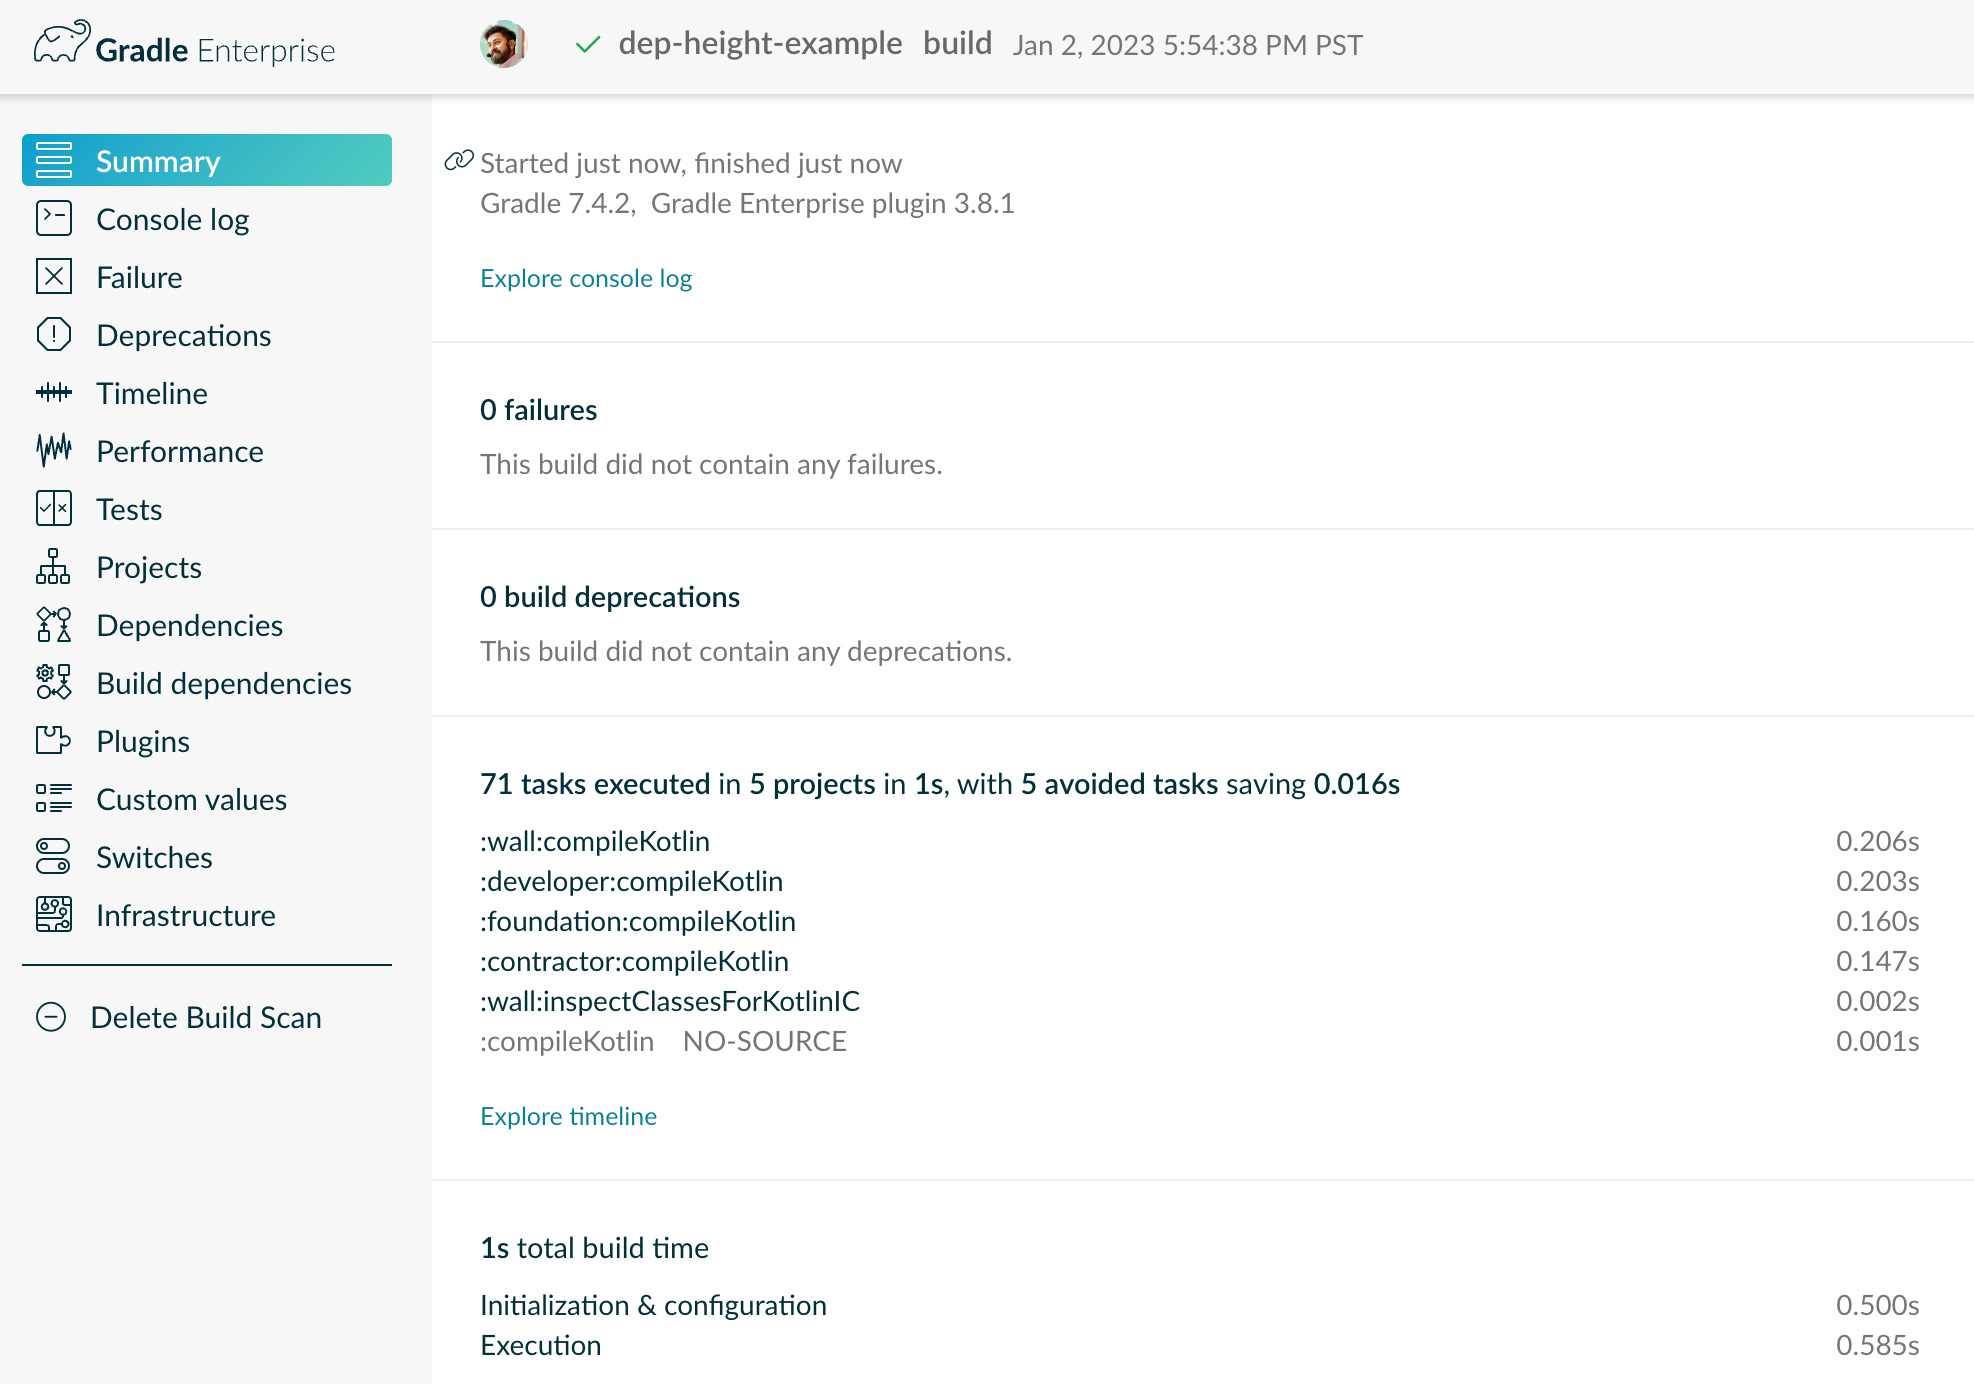
Now to get information about your dependencies click on the Dependencies item in the left menu navigation menu.

This will show you an interactive searchable dependency report in which
- You can search for dependencies.
- You can see dependencies for different configurations.
- You can find out which library or module or project uses this dependency.
- You can even see which repository they come from.
In addition to this, there is a lot more information you have access to in this build scan report. However, this is out of the scope of this article.
Finally, let’s look at the most straightforward way to generate the dependency tree for your project using android studio.
5. Using Android Studio's Gradle Plugin
You can use Android Studio’s Gradle plugin to generate and view the structure of gradle dependencies. This might seem like the easiest way. However, I do not recommend this for large-scale projects since it can slow you down significantly. This is the reason, I am discussing this approach as the last one.
How to generate Gradle Dependency Tree with Android Studio?
- First open your Android Studio and Click on the Gradle Tab.
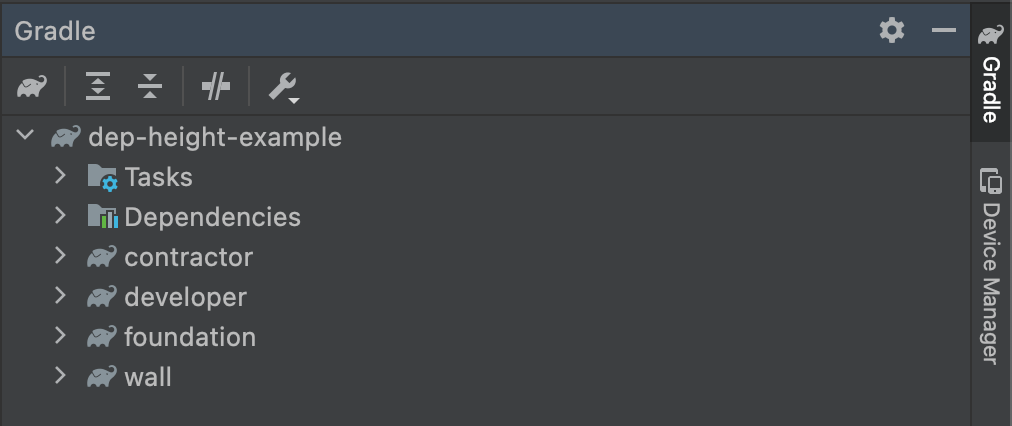
- For an Android Project
Then expand:yourmodule->Tasks->android. Finally, double click onandroidDependenciesto execute the task. - For a Java or Kotlin Project
Then expand:yourmodule->Tasks->help. Finally, double click ondependenciesto execute the task.
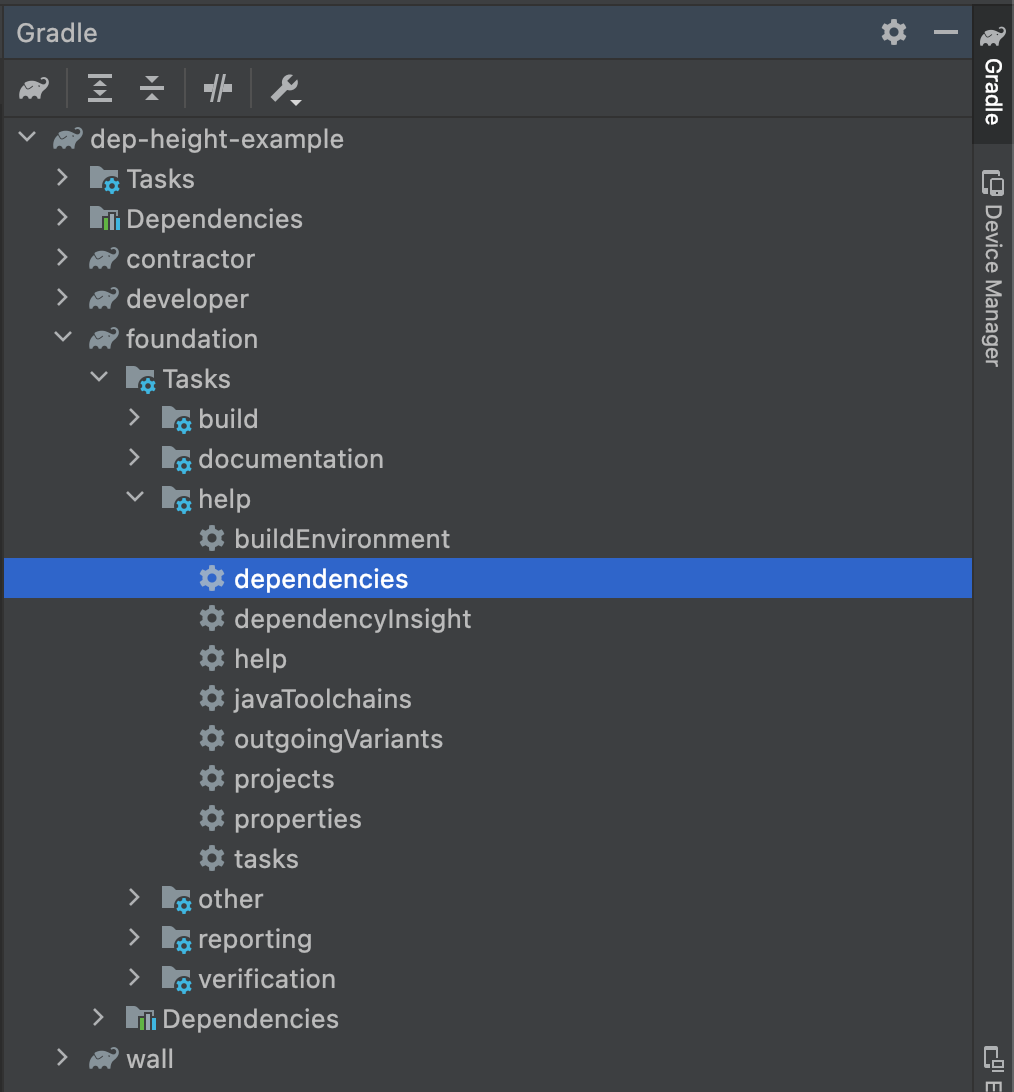
- After this task finishes executing it will print the whole dependency tree report in the console of Android Studio.

What are Omitted Dependencies?
You might have come accross a message in the output that says
(*) - dependencies omitted (listed previously)It means gradle removes duplicate sections from your dependencie tree to keep the output concise. It doesn't actually affect your real dependency graph.
What are Failed Dependencies?
In the output of your dependency tree if any dependency is marked as FAILED then it means that Gradle could not locate it in any of your configured repositories.
It could be due to many reasons including but not limited to:
- Incorrect versioning
- Connectivity Issues
- Proxy Concerns on your machine
- Misspelled dependency name
What is Dependency Configuration Inheritance?
As you might have seen in the screenshots above Dependency Configurations support inheritance. When a dependency configuration inherits from another configuration, it automatically gets access to all the dependencies of its parent.
For example, consider an Android project. The app's build.gradle file will have its own dependencies, such as the Android Support Library and any third-party libraries that the project uses.
However, these dependencies can also be inherited from other scopes, such as a library module or even your organization’s internal repository of pre-packaged libraries. This allows you to easily keep your project up-to-date with the latest libraries and also simplifies maintenance.
Gradle dependency configuration inheritance makes it easy to manage complex projects and keep them organized.
Conclusion
By reading this post, you should now have a solid understanding of Gradle dependency tree and are now equipped with the knowledge to generate a Gradle dependency tree using different ways for any project. Please share this article on LinkedIn and Twitter.
If you have any doubts regarding this, feel free to leave a comment below!


